Hello,
I have moved all samples files to a Google Docs folder which can be accessed through the following link:
ObjectARX & Dummies Docs
It the above link does not work, copy and paste the following URL at your Browser:
https://docs.google.com/leaf?id=0By7BVn8vCBxnYjZjNWJhZjYtZjE3MC00ZjdiLTlmMjMtNTVhNTNjNjE0YjUy&hl=en
Cheers!
Monday, May 16, 2011
Wednesday, September 15, 2010
AutoCAD Mac announced and new Blog about ObjectARX
Hello,
I was really busy lately working behind the scenes with AutoCAD for Mac which was announced last August 31st by Autodesk.
I have attended this event and I'm totally excited about this new platform and all technology that it brings into the spot of AutoCAD community.
I have just created a new Blog entirely dedicated to this subject and I'm preparing some great material to share with you as soon as the product starts to ship.
More information here:
http://arxformac.blogspot.com/
Cheers!
Thursday, April 29, 2010
Visual Studio 2010
Hello,
I was playing around with the brand new Visual Studio 2010 and have found a really cool new feature. Actually this is something I'm waiting for years.
The problem:
Every new Visual Studio version requires you to create a new project and maintain it along the other versions. I had a situation once that I need to keep VS2005, VS2005 and VS2008 projects. What a pain! As soon as you add a new class to your project you need to replicate that to the other versions. It was chaotic!
The new feature:
VS2010 have introduced a new cool feature called "Platform Toolset". It allows you to target your build using specific VS libraries which allow you to build binaries as if you are using previous VS versions. Natively it comes with v100 and v90 platforms (v100 is the default). I did some testing targeting v90 and it really works. The generated DLL (in my case an ARX module) was totally compatible with the Host application (in this case AutoCAD).
More than that, with the ability to create your custom targets open a totally new world of VS projects management which will save you hours copying thing to keep your source code updated.
Further reading:
VS 2010 Enhancements
VS 2010 native Multi-targeting
I have used Visual Studio 2010 Professional Trial version to test this and you can download it from here:
Visual Studio 2010 Trial Download
Cheers!
Saturday, May 16, 2009
AU2008 Class
Hello,
Several people have asked me about some advice on creating custom classes inside ObjectARX.
I have made a detailed tutorial and presented it as a Class last year at Autodesk University.
There is an online video recording, PPT and PDF of this class at AU2008 website:
AU2008
For your convinience, I have also posted a direct link to the PDF:
Download
This is the link for related source files:
Projects_Exercise2.zip
This is the link for the Step6 converted to VS2010 SP1, using Toolset V90 and ObjectARX 2012. You will also need VS2008 SP1 installed to be able to compile it.
Exercise2_VS2010_ARX2012.zip
Best regards,
Fernando Malard.
Wednesday, February 11, 2009
AutoCAD 2010 announced!
Hello,
AutoCAD 2010 was announced:
http://finance.yahoo.com/news/Autodesk-Takes-3D-Design-and-prnews-14269988.html
Very exciting new features and better support for .NET programming for customizing entities (I plan to discuss this further soon).
Meanwhile, you may check these new features through a great collection of videos on the following page:
http://heidihewett.blogs.com/files/autocad2010videos.htm
Regards,
Fernando.
Tuesday, April 29, 2008
AU2008 Voting
Hello,
This year, AU (Autodesk University) classes will be rated by vote.
I have sent 3 classes under the Customization & Programming Power Track.
If you plan to attend AU2008 and would like to see one of my classes please take some time to vote through the following link:
AU2008 Voting
My classes are:
1) The Power of ObjectARX® - The Lab – AutoCAD – Level: Advanced
2) The Power of ObjectARX® - The Class – AutoCAD – Level: Intermediate
3) Creating Your Own Vertical Application Through AutoCAD® OEM – AutoCAD – Level: Intermediate
Hope these classes are approved and I hope you are able to attend this year!
Regards,
Thursday, March 27, 2008
Version Control
Hello,
Probably you will need or already need some version controlling on your software or on its modules.
This is made through the VS_VERSION_INFO resource inside C++ projects and through AssemblyInfo.cs file inside C# projects.
I have found an old but up to date tool (runs from VS2002 to VS2008) which allows you to easily manage these version informations. This tool, from Julijan Sribar, is an AddIn which tracks all opened projects and allow you to manage each version information. This tool is provided for free and its source code is also available for download: Versioning Controlled Build
Another issue is how to get this information at runtime to display, for instance, this version at an "About" like dialog inside your product. To do that in VC++ we need to read the VS_VERSION_INFO resource and get what we want. There is also another great article Retrieving version information from your local application's resource, from luetz,explaining how to do that.
Through C# there is no big deal, you can read the version information from AssemblyInfo as follows:
System.Reflection.Assembly oAssembly = System.Reflection.Assembly.GetExecutingAssembly();
System.Diagnostics.FileVersionInfo oFileVersionInfo = FileVersionInfo.GetVersionInfo(oAssembly.Location) ;
MessageBox.Show("Version Info", oFileVersionInfo.ProductVersion);
Hope this help you to keep your file versions organized and updated!
Cheers!
Tuesday, March 25, 2008
Blog Classes content update
Hello,
I have updated and fixed some classes sample code that are not UNICODE aware that will not compile inside VS2005 (ObjectARX 2007, 2008 and 2009).
Basically, I have changed:
- Add _T() macro to all strings;
- Changed strcpy() to _tcscpy() which is UNICODE aware;
- Changed char* to TCHAR* or to ACHAR* pointers;
Important: ACHAR is a typedef present inside "AdAChar.h" ObjectARX header. If you are trying to compile for non-UNICODE ObjectARX versions replace ACHAR* by TCHAR* (or char*) and you should get out of compilation errors.
Cheers!
Wednesday, March 19, 2008
VS2005 Samples
Hello,
I have updated some VS2002 samples to VS2005.
There are two new files, ending with "VC8" which are the VS2005 converted solution/projects.
You can download these projects from here:
VS2005 Samples
These should compile fine with ObjectARX 2007, 2008 and 2009.
Note that if you plan to be 100% compatible with these 3 releases you will need to use the 2007 version of ObjectARX SDK.
Cheers!
Wednesday, February 13, 2008
AutoCAD 2009
Hello,
Yesterday, February 12th, Autodesk has officially announced its 2009 product line.
Read more about here:
http://www.worldpressdays08.com/pages/page.cfm?action=products&sub1=1
AutoCAD 2009 (codename Raptor) will implement several new features like these major ones:
- View Cube (easy 3D view);
- Steering Wheel (easy 3D navigation);
- Office like Ribbon interface;
- Menu Browser;
- Action recorder;
- Geographic location;
- Modeless Layer manager (works now like a toolpallete);
There are much more and you may find these detailed features soon at Autodesk website.
My friend, Shaan Hurley, have a more detailed list at his Blog:
http://autodesk.blogs.com/between_the_lines/2008/02/the-2009-produc.html
Regarding to programming aspects, AutoCAD 2009 is backward compatible with 2007 and 2008. This way an application compiled with ObjectARX 2007 will be able to run inside all these 3 versions.
Actually, AutoCAD 2009 was built using VS2005 Service Pack 1 but if you plan to keep your project backward compatible it is recommended to use VS2005 without Service Pack.
Probably the next version of AutoCAD will break the binary compatibility with 2007,2008 and 2009 and will use VS2008. Autodesk seems to be aligned with Microsoft Visual Studio evolution and will try to make only binary compatibility break on every 3 releases.
Cheers!
Monday, January 14, 2008
AutoCAD GUI tests
Hello,
I would like to introduce a new Blog this year. It will be about AutoCAD Applications GUI tests. The idea behind this Blog is to discuss methods and tools that could be used to test all types of AutoCAD applications against AutoCAD interface to reach a better test experience approaching the real user environment.
If you are interested on discuss this I would like to invite you to visit my new Blog at:
http://acadguitest.blogspot.com/
Best regards,
Tuesday, December 04, 2007
AU2007 was huge!
Hello,
AU2007 was really huge. The initial estimations are around 10.000 attendees.
What can we expect for AU2008 ? 15.000 ???
I will post on the next days my two courses materials but as one of my classes was recorded here is the link for the presentation (you will need to register to AU Online to be able to see the video):
http://autodesk.mediasite.com/autodesk/autologinform/?peid=7a7838a8-1bc6-4d68-8b03-3158b14c023f
Best Regards.
Monday, October 22, 2007
AutoCAD next version ?
Hello,
We are approaching the end of 2007 and if Autodesk keep its policy with annual releases of AutoCAD we will probably have soon the next release which would be 2009.
I would like to ask you what do you expect as new features of this upcoming release. Please add your comments to this post and soon we will see what's new from the next AutoCAD.
Meanwhile, cross your fingers and wait for the official announcement.
Best regards,
Tuesday, August 28, 2007
AU2007
Hello,
For those who will have the opportunity to participate on this year's Autodesk University at Las Vegas I would like to suggest my two classes:
CP401-2
The Power of ObjectARX®
CP405-1
Creating Your Own Vertical Application Through AutoCAD® OEM
Registration:
http://au.autodesk.com/2007/register/
Hope to meet you in Vegas this year!
Regards,
Fernando.
Wednesday, May 30, 2007
AUGI Brazil
Hello,
I would like to invite all Portuguese speaking world to visit the brand new AUGI Brasil website.
AUGI Br was officially launched today (30/05/2007) which is the same day AutoCAD 2008 is being officially announced here in Brazil.
http://www.augibr.com
Congratulations!
Fernando.
I would like to invite all Portuguese speaking world to visit the brand new AUGI Brasil website.
AUGI Br was officially launched today (30/05/2007) which is the same day AutoCAD 2008 is being officially announced here in Brazil.
http://www.augibr.com
Congratulations!
Fernando.
Tuesday, March 06, 2007
Debug AutoCAD 2007 from VS2005 on Windows Vista
Hello,
After some research I have tried to Debug AutoCAD 2007 again but this time starting the Visual Studio 2005 with "Run as Administrator" feature. Now I'm able to Debug AutoCAD 2007 from VS2005.
More tips to come as soon as I figure out them... :)
If you have discovered something else, please share with this Blog!
Cheers!
ObjectARX & Windows Vista
Hello,
I have migrated to Windows Vista Ultimate and would like to share some problems / workaround I have made so far.
The first issue you will face is related to Visual Studio. Windows Vista supports partially (VS2005) and do not natively support previous versions. As I have several projects running on AutoCAD 2005 and 2006 (they require VS2002 to compile) I need a way to run then from inside Windows Vista. I have then remembered the good old Microsoft Virtual PC which is now free and has a new release 2007.
I have downloaded and installed (Virtual PC 2007). After that I have then created a new virtual machine with Windows XP PRO SP2 and then installed AutoCAD 2005, 2006 and VS2002. Of course my machine helps a lot because it runs an Intel Core 2 Duo processor and has 2Gb RAM. The Virtual PC 2007 runs well but it causes some erratic mouse moves and some small locks. Unsatisfied with that I then go to the Google and find out a great tip about how to improve Virtual PC 2007 performance adding a new parameter to its (XML configuration file). After changed this it runs fast and without any erractic mouse moves. (Thanks to Jeff Lynch)
Regarding to AutoCAD 2007 and Windows Vista at the beginning I was unable to run it. As I'm new to Vista I have found a command when you right click on the application "Run as Administrator". This did the trick and now I'm able to open AutoCAD but I'm still unable to Debug or Attach to Process on Vista. This is not the proper solution once Autodesk already told us about some issues related with Vista and will release soon a Service Pack to AutoCAD 2007 and LT 2007:
AutoCAD 2007 and LT 2007
AutoCAD 2008: It will be released soon and some good information about its integration with Windows Vista can be found here:
AutoCAD 2008
(Thanks to Shaan Hurley)
That's it for now.
Cheers!
Tuesday, February 13, 2007
AutoCAD 2008 is coming...
Hello,
Autodesk has announced the upcoming AutoCAD 2008 version. It will be released on both 32-bit and 64-bit versions. There is no change on dwg file format. Further it will officially support Windows Vista.
More information will be announced soon from Autodesk. Stay tuned at:
http://www.autodesk.com
http://through-the-interface.typepad.com/
http://autodesk.blogs.com/between_the_lines/
Cheers!
Friday, January 12, 2007
Exercise2 - Step6
Creating a Custom Entity – Exercise 2 – Step 6
On this step we will implement a pretty nice feature. Imagine you would like to add a hatch filling to your custom entity. We can take advantage of ObjectARX embedded object feature to implement this. There is a class called AcDbHatch which represents the AutoCAD hatch entity. This class can be used as an embedded object and we can use its worldDraw() method to draw our own hatch pattern. The first thing you need to do is to add an AcDbHatch member to our custom entity’s class. We will also declare the SetupHatch() method to setup the hatch properties. To do that, open the AuPolyline.h file, and place the following lines at the end of class declaration:
protected:
AcDbHatch m_Hatch;
public:
void SetupHatch();
Further, we will need to add 3 more methods to our entity to handle modifications. The first method will handle all graphic transformations. The 2 remaining methods will handle the STRETCH command:
public:
virtual Acad::ErrorStatus transformBy(const AcGeMatrix3d & xform);
virtual Acad::ErrorStatus getStretchPoints(
AcGePoint3dArray & stretchPoints) const;
virtual Acad::ErrorStatus moveStretchPointsAt(
const AcDbIntArray & indices, const AcGeVector3d & offset);
Our hatch object needs to be configured. To do this we will place, inside the custom entity’s constructor located at AuPolyline.cpp file, the following code (note that this configuration needs to be done only once so the constructor is the better place to put it):
Now we need to add the SetupHatch() method implementation to build the hatch loop according to our polyline boundary. The code will be as follows:
On line 22 we append the arrays to the hatch entity as one loop. The loop can be also a hole into the hatch surface but in this example our loop is AcDbHatch::kDefault. On line 24 we finish the hatch configuration process by calling the evaluateHatch() method which will generate the hatch itself.
We need to call the SetupHatch() method inside some of our methods. The first place is inside the dwgInFields(). Place a call to this method at the end of this method as follows:
The second method on lines 09-13, getStretchPoints(), is responsible to return the points that are enabled to stretch the entity. In this case we would like to add all of our polyline vertexes. This method can reuse the getGripPoints() method which returns the same points we want.
The last method on lines 15-22, moveStretchPointsAt(), is responsible to apply the stretch transformation over the entity. We will also reuse the existing method moveGripPointsAt() because it does exactly what we need. Next we just need to call SetupHatch() again to ensure our hatch is updated with the new boundary resulting from the STRETCH command.
Before test our custom entity, we need to place a call to SetupHatch() just before to close the entity on its creation stage. Open the acrxEntryPoint.cpp file, of AuUserInterface project, and locate the AuUserInterface_MyCommand1() method. See the code below:
Our AuPolyline entity is derived from AcDbPolyline, right? So do you expect that a specific polyline commands like PEDIT work with our entity? Yes, it works! Try to fire the PEDIT command and select our polyline. It will accept it and will allow you to change the AuPolyline as if it is a native AutoCAD Polyline. You can add new vertexes, remove existing, join new segments and even open the polyline (Figure 19). Great!
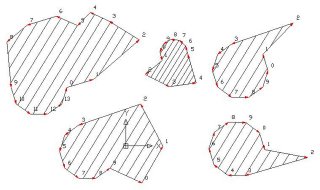
Figure 19 – AuPolyline modifications.
Conclusion
In this session you have learned how to create a custom entity and add some of the possible features ObjectARX allows. This is really only the tip of the iceberg. There are much more you can do using ObjectARX classes and implementing more sophisticated features. I really hope you have enjoyed this session and hope it may help you to make the startup into the ObjectARX world.
On this step we will implement a pretty nice feature. Imagine you would like to add a hatch filling to your custom entity. We can take advantage of ObjectARX embedded object feature to implement this. There is a class called AcDbHatch which represents the AutoCAD hatch entity. This class can be used as an embedded object and we can use its worldDraw() method to draw our own hatch pattern. The first thing you need to do is to add an AcDbHatch member to our custom entity’s class. We will also declare the SetupHatch() method to setup the hatch properties. To do that, open the AuPolyline.h file, and place the following lines at the end of class declaration:
protected:
AcDbHatch m_Hatch;
public:
void SetupHatch();
Further, we will need to add 3 more methods to our entity to handle modifications. The first method will handle all graphic transformations. The 2 remaining methods will handle the STRETCH command:
public:
virtual Acad::ErrorStatus transformBy(const AcGeMatrix3d & xform);
virtual Acad::ErrorStatus getStretchPoints(
AcGePoint3dArray & stretchPoints) const;
virtual Acad::ErrorStatus moveStretchPointsAt(
const AcDbIntArray & indices, const AcGeVector3d & offset);
Our hatch object needs to be configured. To do this we will place, inside the custom entity’s constructor located at AuPolyline.cpp file, the following code (note that this configuration needs to be done only once so the constructor is the better place to put it):
AuPolyline::AuPolyline () : AcDbPolyline ()
{
m_Hatch.setNormal(AcGeVector3d::kZAxis);
m_Hatch.setElevation(this->elevation());
m_Hatch.setAssociative(true);
m_Hatch.setPatternScale(1.0);
m_Hatch.setPatternAngle(45.0);
m_Hatch.setHatchStyle(AcDbHatch::kNormal);
m_Hatch.setPattern(AcDbHatch::kPreDefined,_T("LINE"));
}
Now we need to add the SetupHatch() method implementation to build the hatch loop according to our polyline boundary. The code will be as follows:
void AuPolyline::SetupHatch()
{
assertWriteEnabled();
// Remove previous loop
for (int l=0; l<m_Hatch.numLoops(); l++)
m_Hatch.removeLoopAt(l);
// Insert the updated loop
AcGePoint2dArray vertexPts;
AcGeDoubleArray vertexBulges;
// Collect points and bulges
for(int i=0; i<numVerts(); i++) {
AcGePoint2d pt2d;
double bulge = 0.0;
this->getPointAt(i,pt2d);
this->getBulgeAt(i,bulge);
vertexPts.append(pt2d);
vertexBulges.append(bulge);
}
// Close the loop
vertexPts.append(vertexPts.first());
vertexBulges.append(vertexBulges.first());
m_Hatch.appendLoop(AcDbHatch::kDefault, vertexPts, vertexBulges);
// Refresh hatch
m_Hatch.evaluateHatch();
}
On line 22 we append the arrays to the hatch entity as one loop. The loop can be also a hole into the hatch surface but in this example our loop is AcDbHatch::kDefault. On line 24 we finish the hatch configuration process by calling the evaluateHatch() method which will generate the hatch itself.
We need to call the SetupHatch() method inside some of our methods. The first place is inside the dwgInFields(). Place a call to this method at the end of this method as follows:
Acad::ErrorStatus AuPolyline::dwgInFields (AcDbDwgFiler *pFiler)
{
[ some lines were not displayed for code brevity ]
// Setup hatch
SetupHatch();
return (pFiler->filerStatus ()) ;
}
Acad::ErrorStatus AuPolyline::moveGripPointsAt (
const AcDbVoidPtrArray &gripAppData,
const AcGeVector3d &offset, const int bitflags)
{
assertWriteEnabled () ;
for (int g=0; g<gripAppData.length(); g++)
{
// Get grip data back and see if it is our 0 Grip
int i = (int)gripAppData.at(g);
// If it is our grip, move the entire entity. If not, forward the call
if (i == 9999)
this->transformBy(offset);
else
{
AcDbCurve::moveGripPointsAt (gripAppData, offset, bitflags);
SetupHatch();
}
}
return (Acad::eOk);
}
Adesk::Boolean AuPolyline::worldDraw (AcGiWorldDraw *mode)
{
[ some lines were not displayed for code brevity ]
// =======================================================
// HATCH
m_Hatch.worldDraw(mode);
//------ Returning Adesk::kFalse here will force viewportDraw() call
return (Adesk::kTrue) ;
}
// -------------------------------------------------------------------------
Acad::ErrorStatus AuPolyline::transformBy(const AcGeMatrix3d & xform)
{
Acad::ErrorStatus retCode = AcDbPolyline::transformBy (xform) ;
m_Hatch.transformBy(xform);
return (retCode) ;
}
// -------------------------------------------------------------------------
Acad::ErrorStatus AuPolyline::getStretchPoints(AcGePoint3dArray & stretchPoints) const
{
AcDbIntArray osnapModes,geomIds;
return this->getGripPoints(stretchPoints,osnapModes,geomIds) ;
}
// -------------------------------------------------------------------------
Acad::ErrorStatus AuPolyline::moveStretchPointsAt(
const AcDbIntArray & indices,
const AcGeVector3d & offset)
{
Acad::ErrorStatus ret = AcDbPolyline::moveGripPointsAt (indices, offset);
SetupHatch();
return ret;
}
The second method on lines 09-13, getStretchPoints(), is responsible to return the points that are enabled to stretch the entity. In this case we would like to add all of our polyline vertexes. This method can reuse the getGripPoints() method which returns the same points we want.
The last method on lines 15-22, moveStretchPointsAt(), is responsible to apply the stretch transformation over the entity. We will also reuse the existing method moveGripPointsAt() because it does exactly what we need. Next we just need to call SetupHatch() again to ensure our hatch is updated with the new boundary resulting from the STRETCH command.
Before test our custom entity, we need to place a call to SetupHatch() just before to close the entity on its creation stage. Open the acrxEntryPoint.cpp file, of AuUserInterface project, and locate the AuUserInterface_MyCommand1() method. See the code below:
static void AuUserInterface_MyCommand1(void)
{
[ some lines were not displayed for code brevity ]
pL->SetupHatch();
pL->close();
}
Our AuPolyline entity is derived from AcDbPolyline, right? So do you expect that a specific polyline commands like PEDIT work with our entity? Yes, it works! Try to fire the PEDIT command and select our polyline. It will accept it and will allow you to change the AuPolyline as if it is a native AutoCAD Polyline. You can add new vertexes, remove existing, join new segments and even open the polyline (Figure 19). Great!
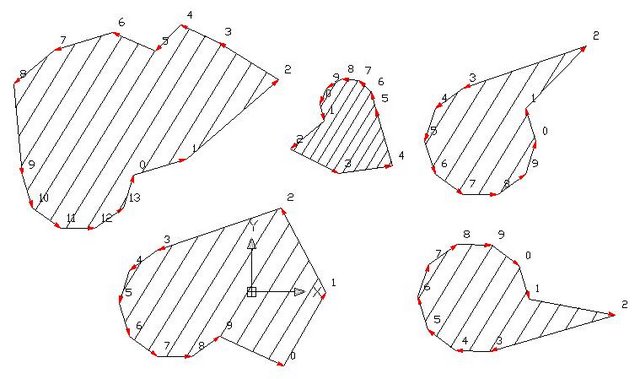
Figure 19 – AuPolyline modifications.
Conclusion
In this session you have learned how to create a custom entity and add some of the possible features ObjectARX allows. This is really only the tip of the iceberg. There are much more you can do using ObjectARX classes and implementing more sophisticated features. I really hope you have enjoyed this session and hope it may help you to make the startup into the ObjectARX world.
Exercise2 - Step5
Creating a Custom Entity – Exercise 2 – Step 5
Sometimes you need to distribute an AutoCAD drawing with custom entities inside. By default, when AutoCAD opens a drawing and find some entity it does not recognize, it protects this entity and packs its binary data into a Proxy entity. The proxy entity protects your object data avoiding unwanted users to manipulate your custom entities.
The proxy entity is merely a dummy entity with a fixed graphical representation. Several features of your custom entity will not be available once your code is not there to provide these methods. If your drawing is opened by an unadvised user that would be nice if you inform this user about the missing application.
The proxy can contain specific graphics which will be generated with a call to your worldDraw() method just before AutoCAD close the drawing. The worldDraw() method has a parameter, an AcGiWorldDraw pointer, that allows you to call a regenType() method to find out if the caller is requesting proxy graphics to your entity. At this time, you can draw a different graphic to make and advertisement of your missing custom entity. The following code shows how to handle the proxy graphics:
Unfortunately this solution is not complete for AcDbPolyline derived entities. There is a problem when a polyline needs to generate its proxy graphics and the worldDraw() method is not called. To solve this problem we need to add another method, called saveAs(), to our class. This method has the following declaration:
virtual void saveAs(AcGiWorldDraw * mode, AcDb::SaveType st);
The implementation of this method is as follows:
To test this behavior create some AuPolyline entities, save the drawing, close AutoCAD and then open this DWG without loading the application modules. Once the DWG file is opened you will see a proxy warning dialog with some information about the missing application (Figure 18).

Figure 18 – Proxy Information dialog.
Note on the Figure 18 that our proxy text is displayed and also, at the proxy information dialog, you may find information about the missing application. This dialog allows users to choose one of the 3 options about how AutoCAD will handle its proxy entities. You can also setup the standard proxy behavior accessing Tools > Options > Open and Save.
Remember that the DBX module can be loaded to re-enable the custom entity or you can also send your DBX module along with the DWG file to enable third-party users to see your custom entity with complete information. This way you can provide a full graphical representation without the application interfaces (ARX module). The third-party users will be able to see it but can’t modify the custom entity.
AutoCAD allows some basic operations over the proxy entity like erase, change layer, change color and transformations. These operations will act basically over its dummy graphical representation (they will not affect your custom entity’s data except when it is erased). It is up to the developer to determine the most adequate flags for each custom entity. This is a compiler-time option and it is defined on the custom entity’s class implementation macro (ACRX_DXF_DEFINE_MEMBERS). This flags can be combined to build a complete configuration. Please refer to ObjectARX SDK documentation for further information about proxy flags.
Sometimes you need to distribute an AutoCAD drawing with custom entities inside. By default, when AutoCAD opens a drawing and find some entity it does not recognize, it protects this entity and packs its binary data into a Proxy entity. The proxy entity protects your object data avoiding unwanted users to manipulate your custom entities.
The proxy entity is merely a dummy entity with a fixed graphical representation. Several features of your custom entity will not be available once your code is not there to provide these methods. If your drawing is opened by an unadvised user that would be nice if you inform this user about the missing application.
The proxy can contain specific graphics which will be generated with a call to your worldDraw() method just before AutoCAD close the drawing. The worldDraw() method has a parameter, an AcGiWorldDraw pointer, that allows you to call a regenType() method to find out if the caller is requesting proxy graphics to your entity. At this time, you can draw a different graphic to make and advertisement of your missing custom entity. The following code shows how to handle the proxy graphics:
// ==================================================================
// PROXY
if (mode->regenType() == kAcGiSaveWorldDrawForProxy)
{
// Draw dummy text
CString strTxt = _T("AU Polyline");
AcGePoint3d ptTxt = GetPolylineCenter();
mode->geometry().text(ptTxt, AcGeVector3d::kZAxis, AcGeVector3d::kXAxis, szRef, 1.0, 0.0, strTxt);
}
Unfortunately this solution is not complete for AcDbPolyline derived entities. There is a problem when a polyline needs to generate its proxy graphics and the worldDraw() method is not called. To solve this problem we need to add another method, called saveAs(), to our class. This method has the following declaration:
virtual void saveAs(AcGiWorldDraw * mode, AcDb::SaveType st);
The implementation of this method is as follows:
void AuPolyline::saveAs(AcGiWorldDraw * mode, AcDb::SaveType st)
{
AcDbPolyline::saveAs (mode, st) ;
if ((mode->regenType() == kAcGiSaveWorldDrawForProxy) &&
(st == AcDb::kR13Save))
this->worldDraw(mode);
}
To test this behavior create some AuPolyline entities, save the drawing, close AutoCAD and then open this DWG without loading the application modules. Once the DWG file is opened you will see a proxy warning dialog with some information about the missing application (Figure 18).

Figure 18 – Proxy Information dialog.
Note on the Figure 18 that our proxy text is displayed and also, at the proxy information dialog, you may find information about the missing application. This dialog allows users to choose one of the 3 options about how AutoCAD will handle its proxy entities. You can also setup the standard proxy behavior accessing Tools > Options > Open and Save.
Remember that the DBX module can be loaded to re-enable the custom entity or you can also send your DBX module along with the DWG file to enable third-party users to see your custom entity with complete information. This way you can provide a full graphical representation without the application interfaces (ARX module). The third-party users will be able to see it but can’t modify the custom entity.
AutoCAD allows some basic operations over the proxy entity like erase, change layer, change color and transformations. These operations will act basically over its dummy graphical representation (they will not affect your custom entity’s data except when it is erased). It is up to the developer to determine the most adequate flags for each custom entity. This is a compiler-time option and it is defined on the custom entity’s class implementation macro (ACRX_DXF_DEFINE_MEMBERS). This flags can be combined to build a complete configuration. Please refer to ObjectARX SDK documentation for further information about proxy flags.
Subscribe to:
Posts
(
Atom
)